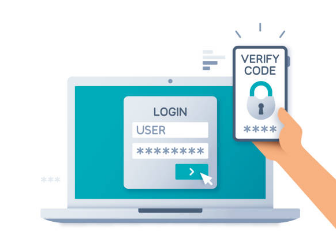

What is Multi-Factor Authentication?
Multi-Factor Authentication (otherwise known as MFA, 2FA or 'two-step verification') is a security feature that protects your Office 365 account. MFA effectively makes it far more difficult for hackers to access your account, thus providing a further layer of protection for your data. MFA differs from using only a traditional username and password in that it also requires confirmation of the device that you are accessing your account from.
Two-factor verification is more secure than just a password because it relies on two forms of authentication:
- Something you know, like your password.
- Something you have, like a phone or other device that you carry.
Two-factor verification can help stop malicious hackers from pretending to be you. Even if they have your password, the odds are that they don't have your device, too.
What You Will Need
- Your desktop/laptop
- Your email account password
How To Setup Multi-Factor Authentication?
- Download and install the Microsoft Authenticator app.
(It is available at Google Play or Apple Store) - Go to www.microsoft.com. Click on Sign in, located on the right side of the webpage.
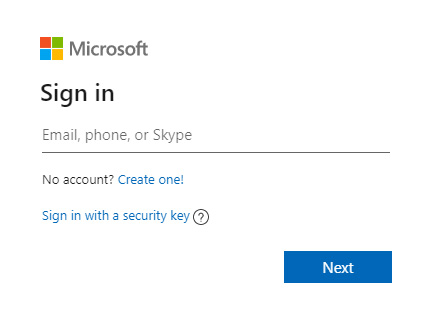
- Type your email address in the box provided.
- Type in your password.
- On more information required screen, click Next.
- On the Additional security verification page, select Mobile app from the Step 1: How should we contact you area.
- Select Receive notifications for verification from the How do you want to use the mobile app area, and then select Set up.
- The Configure mobile app page appears.
- Open the Microsoft Authenticator app, select Add account from the Customize and control icon in the upper-right, and then select Work or school account.
*Note
If this is the first time you're setting up the Microsoft Authenticator app, you might receive a prompt asking whether to allow the app to access your camera (iOS) or to allow the app to take pictures and record video (Android). You must select Allow so the authenticator app can access your camera to take a picture of the QR code in the next step. If you don't allow the camera, you can still set up the authenticator app, but you'll need to add the code information manually.
- Use your device's camera to scan the QR code from the Configure mobile app screen on your computer, and then choose Next.
- Return to your computer and the Additional security verification page, make sure you get the message that says your configuration was successful, and then select Next.
- The authenticator app will send a notification to your mobile device as a test.
- On your mobile device, select Approve.
- On your computer, add your mobile device phone number to the Step 3: In case you lose access to the mobile app area, and then select Next.
**We strongly suggest adding your mobile device phone number to act as a backup if you're unable to access or use the mobile app for any reason.
- Select Done.
If you have any issues or need assistance, please call us at 469-656-3159.